The Ogopogo
One universal connector standard, so any structural module — deck tile, stair tread, wall panel — mates to any post. The parts library the rest of the MM build system is built on.
Documentation
CAD files2 ▸
Designed, not yet built. Parametric CAD scripted from the dimensions on this page, in open formats (STEP opens in FreeCAD and any CAD program). Not engineered or stamped; see the technical library for the math, and check it before you cut anything.
Build math3 ▸
Calculators2 ▸
- Beam shear and notches →
Does the beam hold in shear at the support, and how fast does a notch in the bottom of the end use up the margin?
- Lag-screw joint →
How much load does a lag-screw joint carry, and does the wood tear out before the lags let go?
Why the name
Named for Ogopogo, the serpentine lake monster of Okanagan Lake, British Columbia — rooted in Syilx/Okanagan First Nations legend (N'ha-a-itk, "lake demon") and reported for well over a century, now enough of a fixture that the lake has statues and a provincial park named after it. Fitting namesake for the one connector standard the rest of the catalog quietly runs on: same joint underneath every time, no matter what shape shows up on the surface.
Here's what nobody tells you about a build like this: the barrier to entry is a drill, a saw, some buckets, and pulped cardboard. That's it — not a specialty supplier, not a contractor's toolkit. This is the connector standard the rest of the build system runs on, and it's built to be started by anyone with basic tools and a weekend. Our job isn't to make it sound impressive. It's to hand you the real specs, the real recipe, and the real tool list, and let the thing speak for itself.
The Universal Connector
- Joint type: dovetail tenon (male, on module) into a socket (female, cast into the collar)
- Dovetail angle: 12° per side; tail dimensions 3" narrow end, 3.75" wide end, 2" deep
- Securement: one 3/8" x 4" carriage bolt, square shank seated in a cast square recess to prevent spin
- Elongated bolt slot allows ~±3° fine leveling before final snug; mineral grout locks the joint once position is finalized
Collar Family (Post Interface)
- Flat (5°): near-flat landings, garden bed approaches, gentle ramps
- Standard (12°): typical terrace-style run, most walkway sections
- Steep (20°): steep hillside sections, stair-heavy runs
- Square (90°): barn framing — vertical stacking, wall panels, no slope
Module Library
- Deck Tile: flat walking surface, chains post-to-post; residential variant rated for 40+ psf live load plus snow
- Tread: stair step surface with a cedar nosing insert on the leading edge
- Riser/Spacer Block: fills vertical gaps on steeper runs, stackable in 2"/4" increments
- Landing Plate: wide platform for turns, rest points, or a trailhead/kiosk base
- Girt/Purlin Module: heaviest rebar spec in the library — barn wall/roof framing between posts
- Diagonal Brace: lateral racking resistance at 90° joints — the dovetail/bolt joint alone doesn't resist racking
- Wall Panel: enclosure for blind walls and barn infill, stacks on girt modules
- Rail/Baluster Socket Insert and Nosing/Edge Insert: universal cast-in accessories for any horizontal module
Layup Sequence
- Hardware cloth cut to mold shape, bent up at edges — outer skin, resists surface cracking
- Rebar cage/grid tied inside the hardware cloth, carries load back to the tenon
- Papercrete poured/packed around both layers, screeded to top face — core fill and insulation
- Geopolymer cap poured last as a wear surface — slip resistance and water resistance
- Tenon formed by mold geometry, left exposed and ready to socket
Papercrete Recipe (Cardboard Feedstock)
Base ratio by volume: 3 parts pulped cardboard, 1 part Portland cement (Type I/II), 1–2 parts sand (optional — drop for max insulation/min weight). Strip tape and labels, tear/shred, soak 24–48 hrs to full pulp, drain to thick-oatmeal consistency before adding cement. Skip waxed cardboard — it won't pulp and creates voids. Cure in-mold 3–5 days before demold, air cure 3–4 weeks before load-bearing.
Geopolymer Cap Recipe (Wear Surface)
Fly ash (Class F) or metakaolin, activated with sodium silicate + sodium hydroxide (~2:1 to 2.5:1 silicate:hydroxide by mass), fine sand roughly 1:1 to 1.5:1 with the ash. Pre-mix the activator with ventilation — hydroxide is caustic. Mineral oxide pigments can be added at 3–5% of dry solids for color matching; judge color on fully cured 2–3 week test chips, not wet mix.
First CAD Pass (2026-09-13)
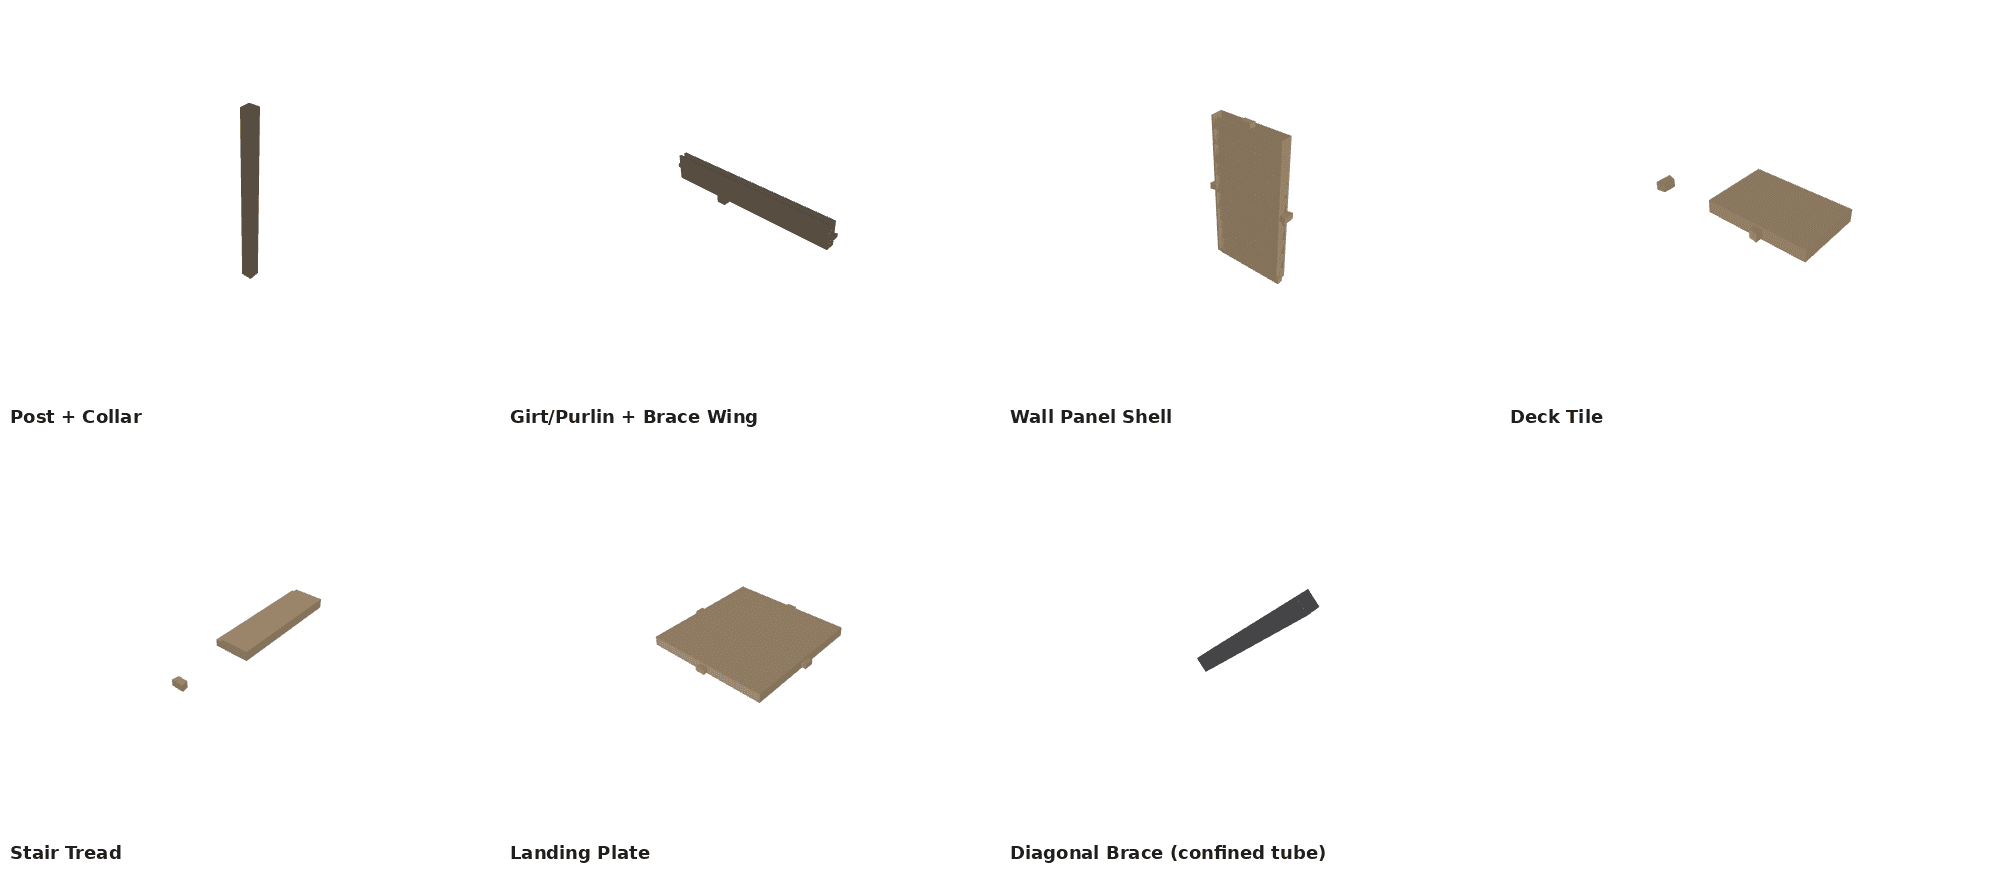
Real FreeCAD geometry now exists for most of the Module Library above: Post + Collar, Girt/Purlin, Wall Panel, Deck Tile, Tread, Landing Plate, and a redesigned Diagonal Brace (a printed hollow confinement jacket around a papercrete/dowel fill, stronger than a bare cast member — the same principle as a concrete-filled steel tube). This is a first CAD pass, not yet run through the panel-by-panel interference verification the connector standard above already has — treat it as in-development, not certified.
Open Items
- Landing plate and trailhead platform exact footprint dimensions — pending first prototype
- Girt/wall panel rebar cage spec — grid spacing still needs a load calc once barn bay spacing is set (bar diameter is now settled — see next item)
- Rebar diameter is now selectable per part: 3/8" (#3, standard) or 1/2" (#4, heavy) — a confirmed choice, not a placeholder. Grid spacing remains unverified either way.
- Post height: embedment is settled — minimum 2 ft in-ground, set in geopolymer or concrete, on every build. Above-grade height genuinely varies by application (barn framing, food-forest trellis, walkway) and is set per-build, not a single fixed number.
- Residential deck tile cage spec — finalize once footing depth/post spacing is confirmed
- Diagonal Brace's angled tenon needs its mating socket cross-checked digitally against the Post + Collar and Girt/Purlin wing sockets before any physical dry-fit — geometrically valid on each side alone, not yet confirmed to actually mate
Tools You'll Need
Drill (an impact driver is better for driving the lag bolts)
Buckets, for mixing the papercrete and the geopolymer
Not yet in our Tool Guide.
A saw — a miter or chop saw is handier, but a basic $8 hardware-store hand saw works fine
Not yet in our Tool Guide.
Something to pulp cardboard for the papercrete — a drill with a blade attachment, a blender, a food processor, or scissors, whatever you've got
Not yet in our Tool Guide.
A 3D printer, to print the connector molds — most public library makerspaces have one
Not yet in our Tool Guide.
A library card — gets you the makerspace 3D printer, plus free cardboard for the papercrete pulp
Not yet in our Tool Guide.